Wednesday 23 June 2010

Final finish

Everything thus far unpainted gets a coat, and the visible bits of the shelves get a second coat, and are left to dry.

A quick sand down the top and front (drawers and fascia), and then a second coat of paint for a smoother finish (apparently).

Drawers with second coat of paint

It might turn out that the insides of the drawers will need a second coat, or the commonly visible parts need a third - but I can always go back to it if that's the case. Probably not though.

So that's the cupboard done - de-shelved, re-shelved, and drawer-ed:

The whole cupboard

Flat front

Everything painted and in place.

Of course, the cupboard is now mostly full with all the tools I bought in order to fit it out!

With stuff in.


Job's a good'un :-)

Completing the chest

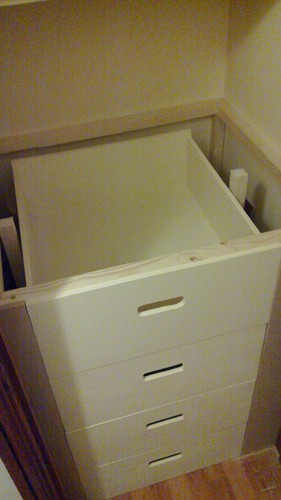
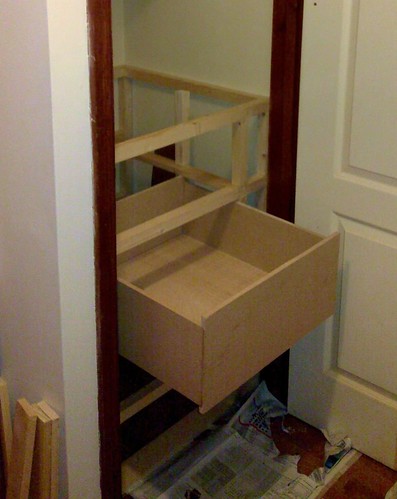
With the drawers in the framework, there are a few holes to fill - namely the top, and the gaps on either side of the drawers at the front. That involves getting more wood though, as I'm lacking single pieces big enough to cover the wider gap on the front right side. I figure I'll try and get a suitable off-cut from the DIY store,

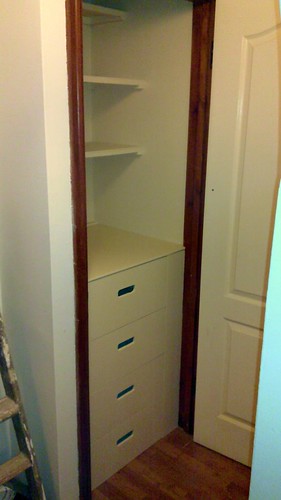
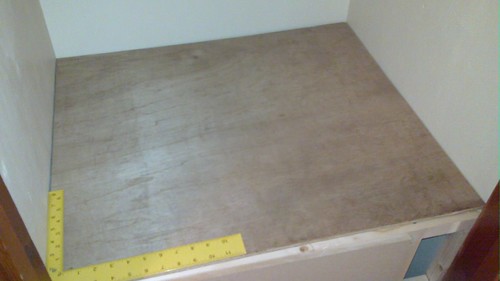
The top might be filled with a piece of plywood from one of the old shelves, unfortunately it's not long enough to reach the front of the drawers - and (because the cupboard is not square) will need to be at an angle. The pic below shows the sheet of plywood square with the back and sides, but the front has a gap larger on the right than the left:

Wonky cupboard

I have a couple of options here: either get a new piece of wood for the top, or fill some space at the back so the existing sheet can come forwards.

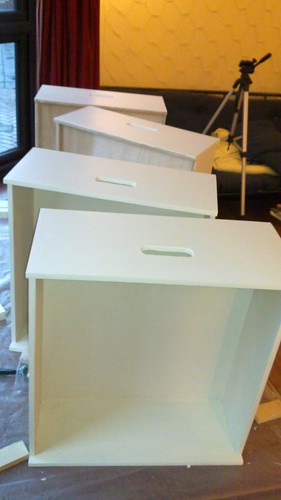
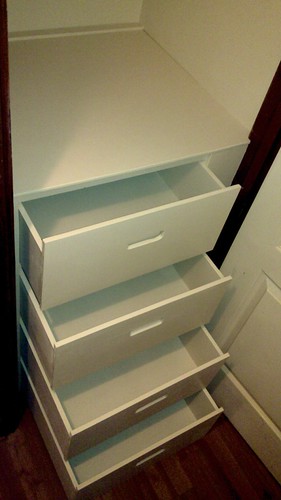
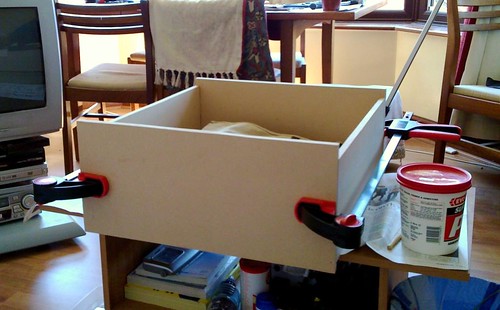
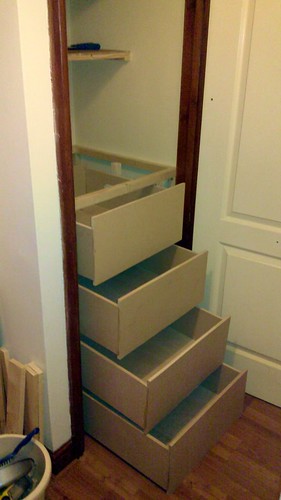
Whilst considering that, I drill, saw, file, and sand handles into the front of each drawer - just a beveled hole about the width of my hand. That's the last major cutting for the drawers, and by this point I'm a little bored, so they're probably a bit rougher than they should be. Never mind, the project is getting pretty close to completion - I can now do some finishing work: filling nail holes and gaps with wood filler, then painting using the same paint used on the cupboard (which was left over from the previous owner's DIY). It's beginning to look presentable.

A trip to my brother's to lend him a tent revealed that he had a load of offcuts from 
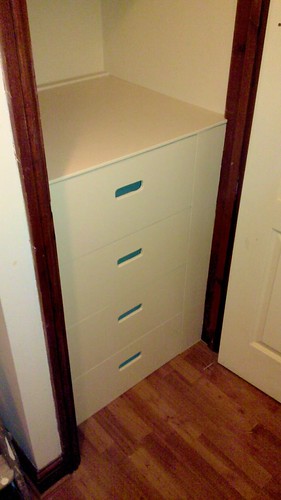
his shelving project (definitely a family trait). I found a suitable piece and nabbed it, and it took very little to cut them to site and nail them in place. With the completely flat front it looks ok - not neat enough for the modernist masterpiece I originally envisioned, but pretty fair.

Painted drawers, and fascia


I decide to go with re-using the materials I already have for the top, and with a bit of sawing and fiddling, it sits quite well:
Painted drawers, fascia, and top


Next up, final painting...

Drawers - part 3: Assembly

The box joints weren't especially close, so would never hold the drawers together by themselves. To make sure they didn't fall apart, I glued the joints, and then nailed them as well, recessing the nails with a nail punch so they wouldn't show in the final result.

The first drawer assembled


The last drawer came together like this (shown at x15 speed):


It even fit the framework:

The first drawer fits!


Alternating between routing and assembly, I put all four drawers together and - with some judicious filing of edges got them to all fit in the framework quite neatly, which was nice.

All drawers assembled

Coming up in the next post, fascia and top...

Drawers - part 2: Routing

Ok, so the Dremel router attachment was delivered and I got back to work. This turned out to be quite tedious, in a classic (not the) right tool for the job way.

The router was needed to make dado joints (simply, straight grooves) on the back, front, and sides of the drawers, and two rabbet joints on the front piece to help fix it to the sides. That's six cuts with the router per drawer, time four drawers is 24 router cuts.

Technically routing with the Dremel worked, but it took a long time to make each cut, as it wasn't powerful enough to go the full depth in one pass - typically needing 5 passes. By the last cut, it took me about 15 mins, earlier ones had taken longer whilst I was getting used to the process and tool.

Here's some video of the last dado, at 15x speed.


Admittedly it would have been quicker if my workbench wasn't so ramshackle, but then again - if I had a router table it would have taken about 5 seconds per cut...

I assembled the first drawer before routing all the parts, so what I learned while assembling it could feed into the next set of cuts. The main point was making sure that all the dado joints lined up well, by combination of measurement with a ruler, and direct comparison of one bit of wood to another.

Assembly coming up in the next post...

Wednesday 16 June 2010

Assembling the framework

Here's the framework assembly video I mentioned in Framework.